Keep your Keycloak application safe from spam and bot traffic with our powerful, easy-to-integrate captcha solution: Fully configurable, GDPR-compliant and focused on ensuring the best possible user experience, puzzle-solving and box-ticking are a thing of the past. Get the captcha plugin for Keycloak now!

How to add a captcha to Keycloak
Maximum protection, maximum privacy: With the captcha.eu plugin, safeguarding your Keycloak application against spam bots and unwanted traffic has never been easier. Our sleek and powerful captcha solution ensures a high level of security across logins, registration and reset credentials – and is fully compliant with all EU data privacy rules and regulations. Here’s how to set up captcha.eu plugin in a few simple steps:
1
Download the Keycloak captcha extension and add target/keycloak-captcha.jar into the extension folder. Restart Keycloak.
2
Next, configure the authentication flows. Captcha.eu supports the following parts/flows:
- Browser (login)
- Registration
- Reset Credentials
1
Go to Authentication and select “browser“. Then make a duplicate by clicking Action > Duplicate.
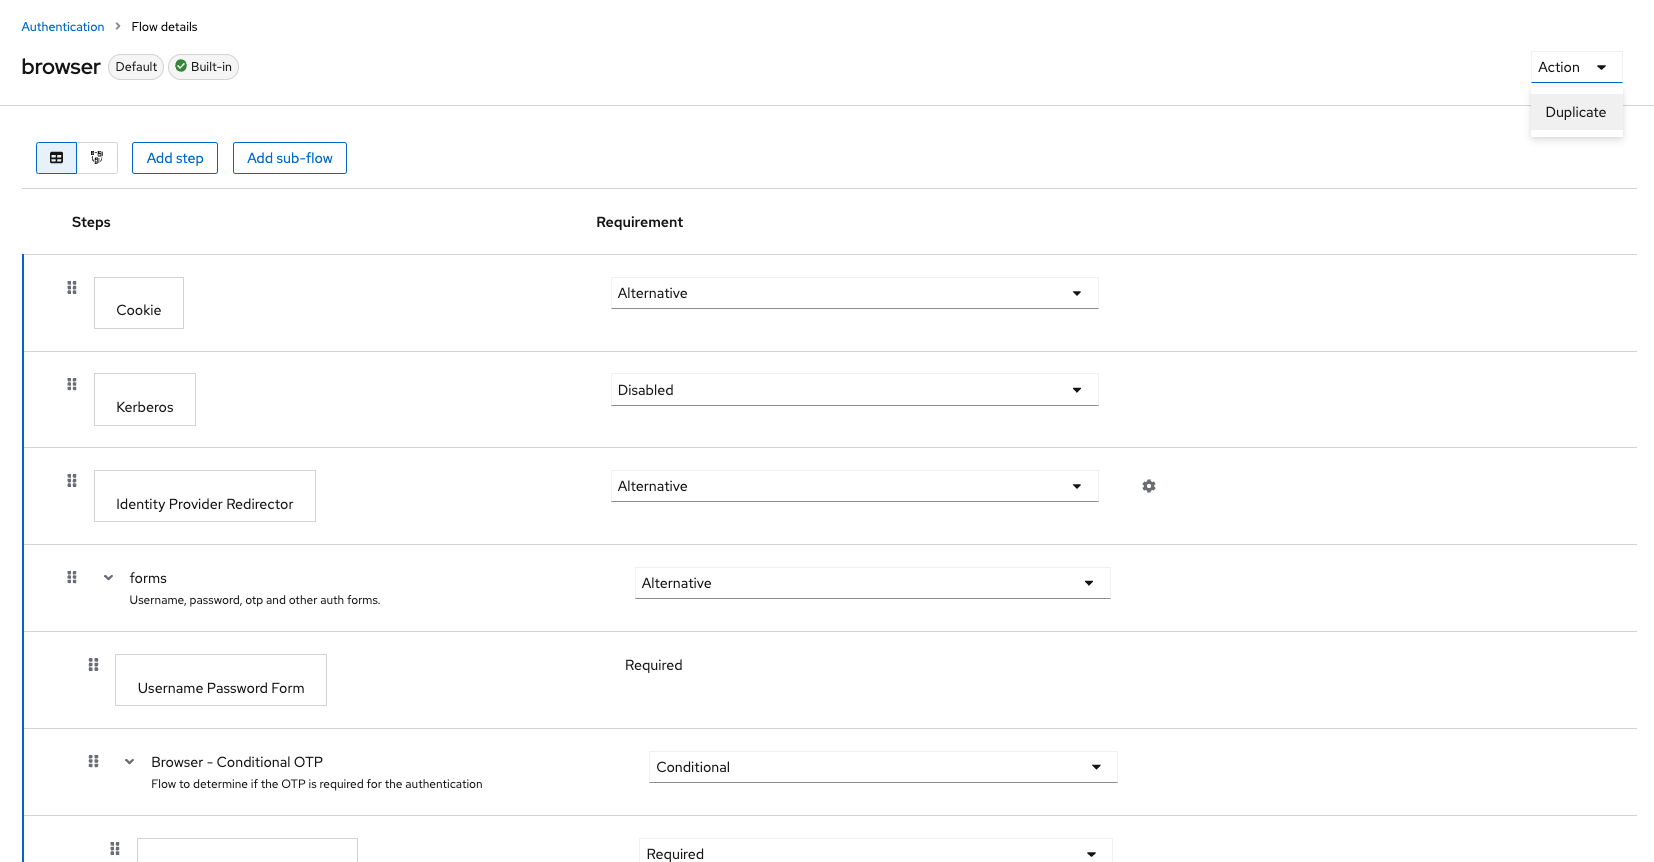
2
Delete the execution “Username Password Form”.
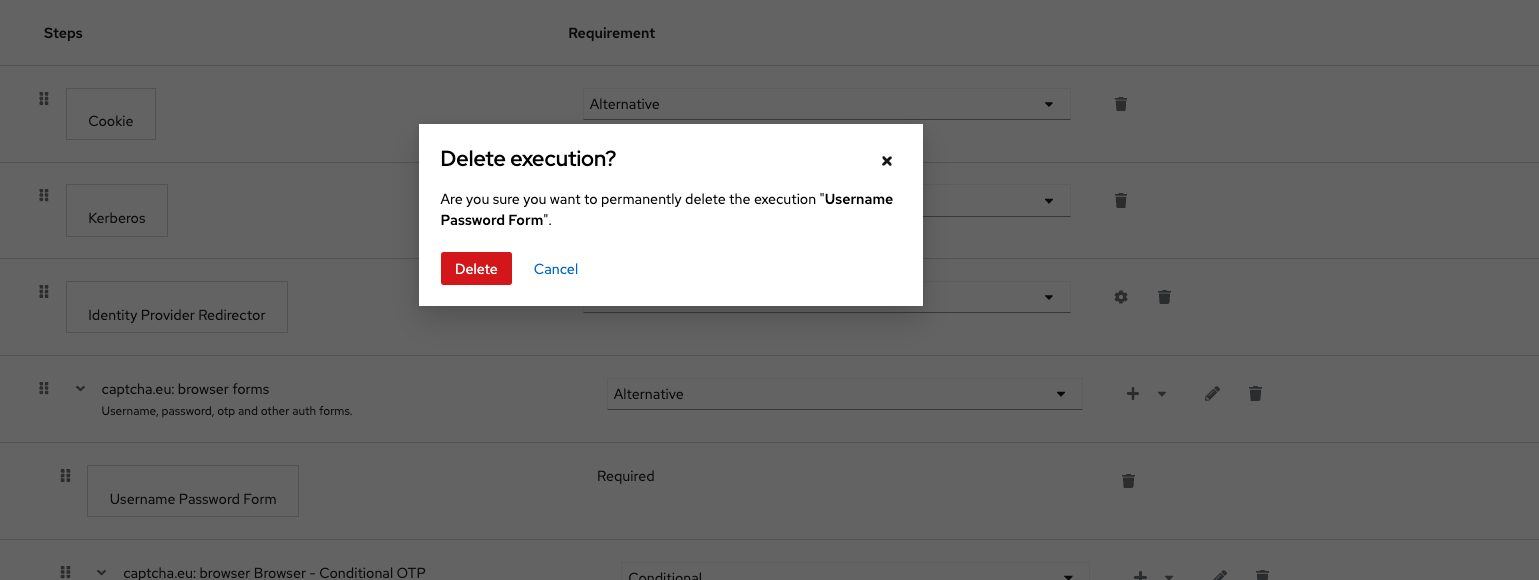
3
Click “Add New Step” in “browser forms”. Browse and select “captcha.eu: Username Password Form“.
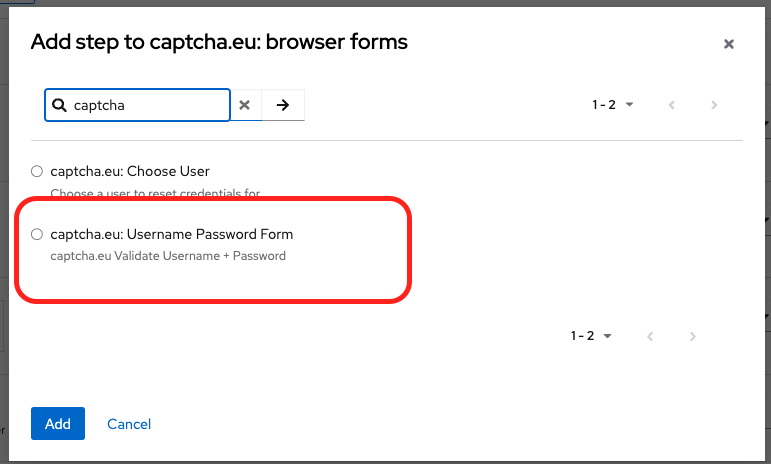
4
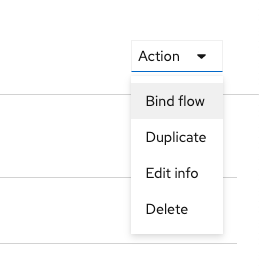
To configure the plugin, click settings and copy-paste the Rest Key and Public Key from your captcha.eu Dashboard into the relevant fields. Click “Save” when you’re done. Then bind the flow to the prod one by clicking “Action” and selecting “Bind flow” from the dropdown menu.
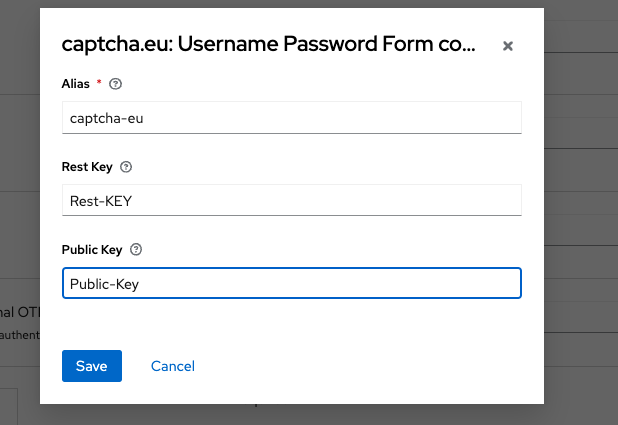
4
Now all that’s left to do is to enable the frontend code. You can do this by adding the snippet below to your existing login.ftl right after the </form> closing tag. Alternatively, you can use the theme that comes with the captcha.eu extension source code, located in /theme/captcha.
<#if captchaEnabled ??>
    <script
        var CaptchaDOMReady = function (callback) {
          document.readyState === "interactive" || document.readyState === "complete"
            ? callback()
            : document.addEventListener("DOMContentLoaded", callback);
        };
        CaptchaDOMReady(function() {
            KROT.setup("${captchaEUPublicKey}");
            var f = document.getElementById("kc-form-login");
            KROT.interceptForm(f);
        });
    </script>
</#if>1
Go to Authentication and select “registration“. Make a duplicate by clicking Action > Duplicate.
2
Delete the “Recaptcha” element and click “Add New Step“. Browse and select “captcha.eu: Registration“. Then change the value to “required“.

3
To configure the plugin, click settings and copy-paste the Rest Key and Public Key from your captcha.eu Dashboard into the relevant fields. Click “Save” when you’re done. Then bind the flow to the prod one by clicking “Action” and selecting “Bind flow” from the dropdown menu.


4
Now all that’s left to do is to enable the frontend code. You can do this by adding the snippet below to your existing register.ftl right after the </form> closing tag. Alternatively, you can use the theme that comes with the captcha.eu extension source code, located in /theme/captcha.
<#if captchaEnabled ??>
    <script>
        var CaptchaDOMReady = function (callback) {
            document.readyState === "interactive" || document.readyState === "complete"
                ? callback()
                : document.addEventListener("DOMContentLoaded", callback);
        };
        CaptchaDOMReady(function() {
            KROT.setup("${captchaEUPublicKey}");
            var f = document.getElementById("kc-register-form");
            KROT.interceptForm(f);
        });
    </script>
</#if>1
Go to Authentication and select “reset credentials“. Make a duplicate by clicking Action > Duplicate.
2
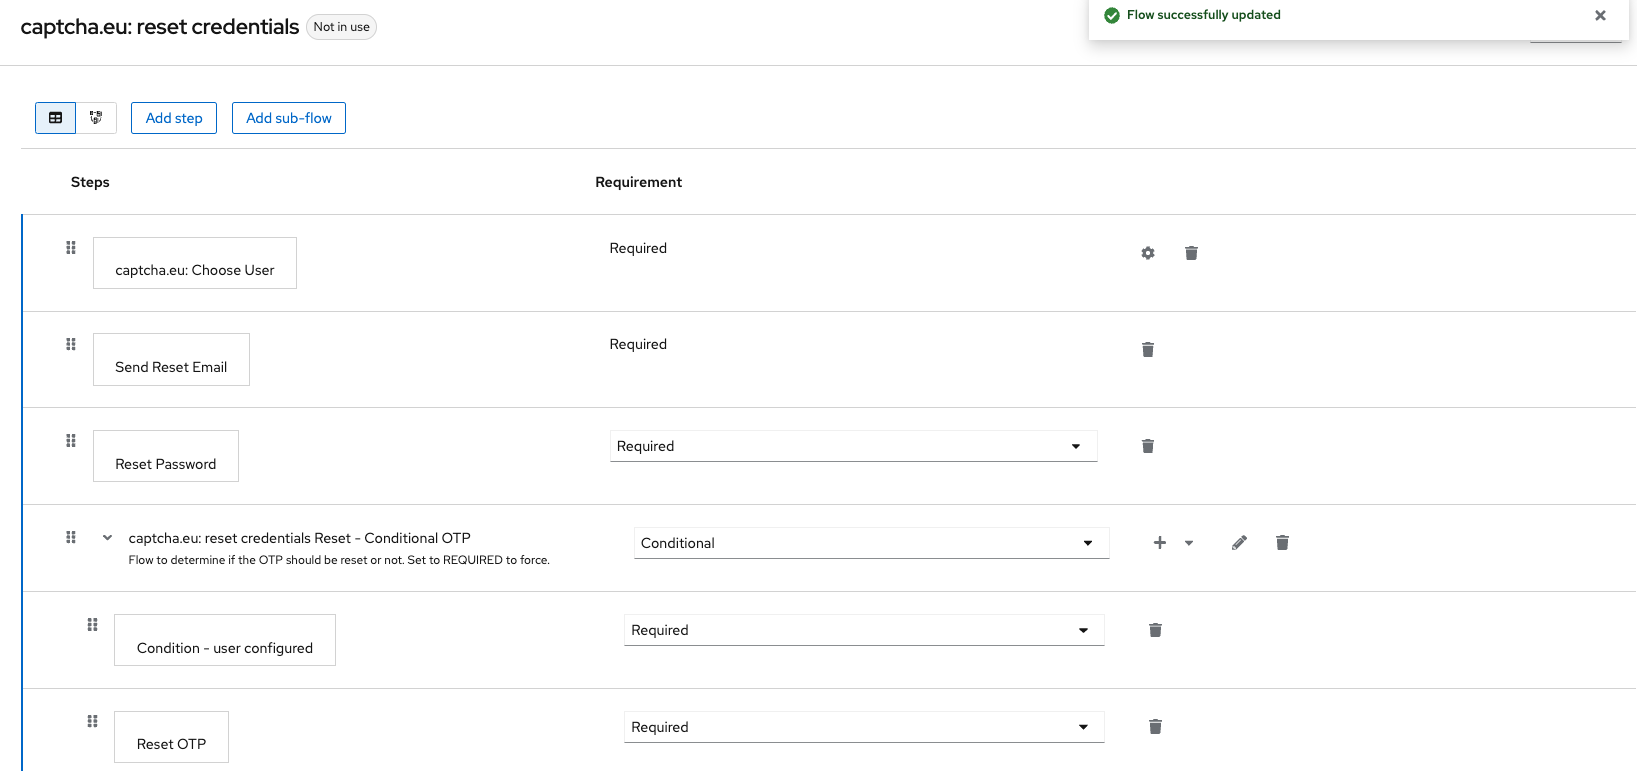
Delete the “Choose User” element and click “Add New Step“. Browse and select “captcha.eu: Choose User“.
3
To configure the plugin, click settings and copy-paste the Rest Key and Public Key from your captcha.eu Dashboard into the relevant fields. Click “Save” when you’re done. Then bind the flow to the prod one by clicking “Action” and selecting “Bind flow” from the dropdown menu.


4
Now all that’s left to do is to enable the frontend code. You can do this by adding the snippet below to your existing login-reset-password.ftl right after the </form> closing tag. Alternatively, you can use the theme that comes with the captcha.eu extension source code, located in /theme/captcha.
<#if captchaEnabled ??>
    <script>
        var CaptchaDOMReady = function (callback) {
            document.readyState === "interactive" || document.readyState === "complete"
                ? callback()
                : document.addEventListener("DOMContentLoaded", callback);
        };
        CaptchaDOMReady(function() {
            KROT.setup("${captchaEUPublicKey}");
            var f = document.getElementById("kc-reset-password-form");
            KROT.interceptForm(f);
        });
    </script>
</#if>
That’s it! Your Keycloak captcha plugin is all set up and ready to use. Got any questions or issues setting up the plugin? Our detailed documentation is right at hand to guide you through the installation process. Or get in touch directly with us via our contact form for added support.
Enjoy maximum protection for your authentication flows without compromising on user experience: Our sleek and powerful captcha plugin for Keycloak is the ultimate solution for effectively safeguarding your browser login, reset credentials and registration forms against unwanted traffic and spam – no box-ticking and puzzle-solving required. Plus: it’s fully GDPR compliant, too!